Complete Installation
Now, you have successfully installed Zenda on your server, and can easily explore it using your client machine’s web browser. Your server is UP, but – sadly – is not running yet!
In order to complete the installation and make your server up & running; there are only 3 steps needed, which are: set static IP, upgrade packages, and register an account.
Set Static IP Address
If you did the installation offline, or may be even online; your server now have a dynamic IP address from the DHCP service, and as you sow in the previous article (link to the installation article), we needed to know the current assigned IP address in order to browse our server. But this address may be changed if we restart our server and a different IP address may be assigned then, which is not suitable for our usage now, or later when we use a phone set. So first, we need to assign a static IP address to our server.
Many ways can be used to set IP address, e.g. you can set it using CLI of the Linux server, or you can use the Server Admin GUI application. But the easiest and most direct way is to use our primary configuration tool, the Zenda Administrator application as follow:
- From your client machine, open web browser, and login to Administrator app (check previous article Installation to see how to access this app).
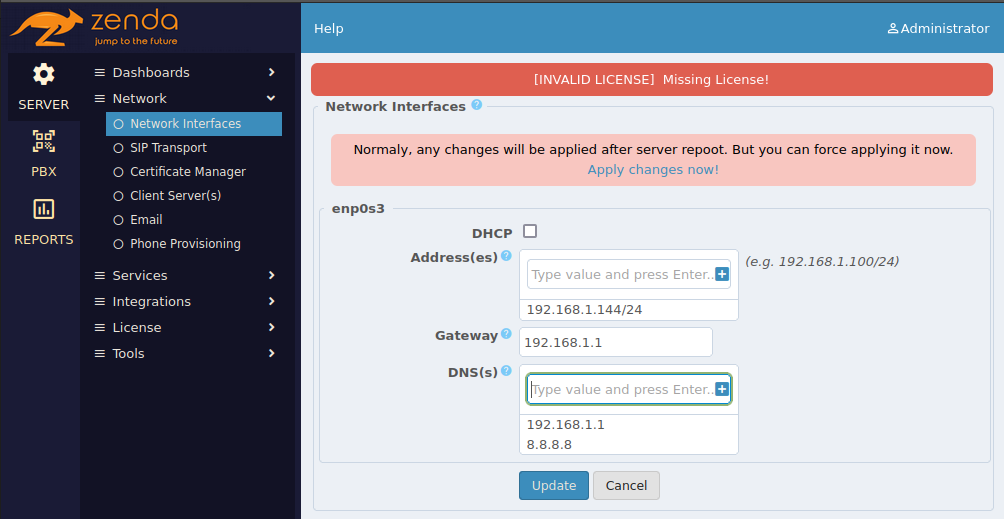
- From Admin app, select SERVER > Network > Network Interfaces.
- Uncheck the DHCP selection, and type in your fixed IP address in addition to your network parameters (e.g. net-mask in CIDR notation format, gateway, and DNSs).
- When click Update; a warning message appear to tell you that some services need to be restarted in order to apply your changes, so just click Apply Changes Now link.
- After that, your current web page will down, and you can browse your server using the new (fixed) IP address.
Upgrade Packages
f you was online during installation (your server was connected to internet); then after finish installing all package will be already updated to the latest versions. But if you was offline, or even after a while of installation; then you’ll need to update your packages manually.
As with the last item (set static IP address), you can use Linux sell CLI, or the Server Admin app to do upgrade, and also as the last item; the most easy & direct way to do that is throw our preferred Zenda Administrator app.
First of all, you have to add Package Info widget to your dashboard (which is empty by default just after installation). Do that by press Add New Widget button, then select Package Info type.
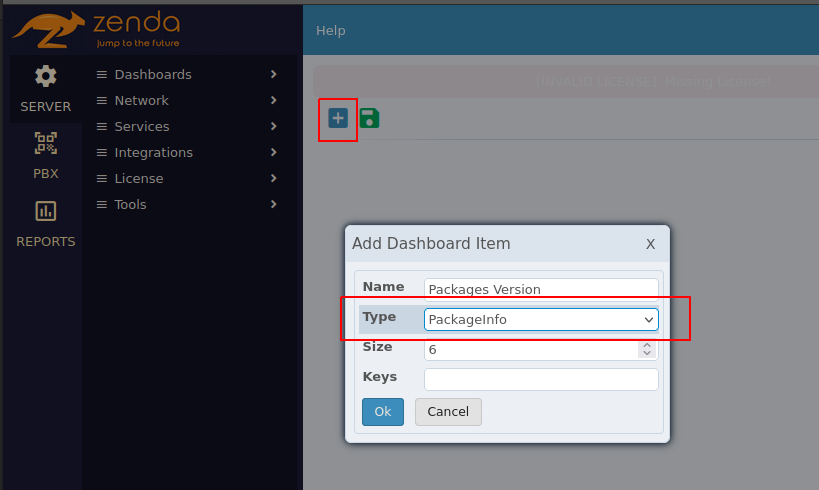
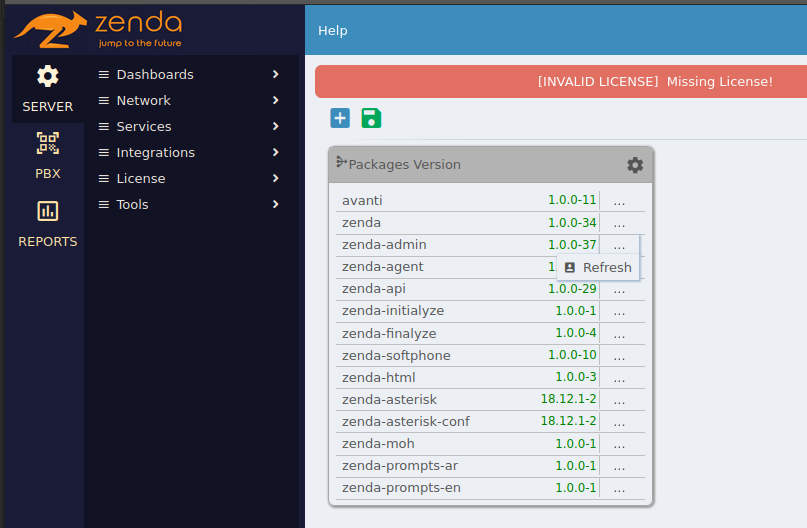
The Package Info widget will monitor the most important packages on your server that construct the whole Zenda system. For each package, it will display the current installed version, and the available update (if any), and all you need to do is pressing the context menu button for any package and select Update menu option.
Register Zenda Account
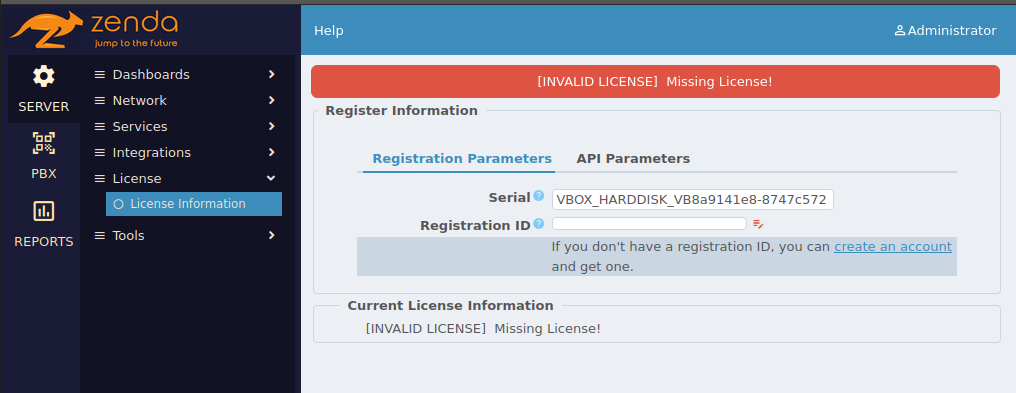
This is the most important step required to complete your installation process and make your server really up & running. You may already noticed the noisy blinking red alarm at the top of the Administrator app, which says “Missing License”.
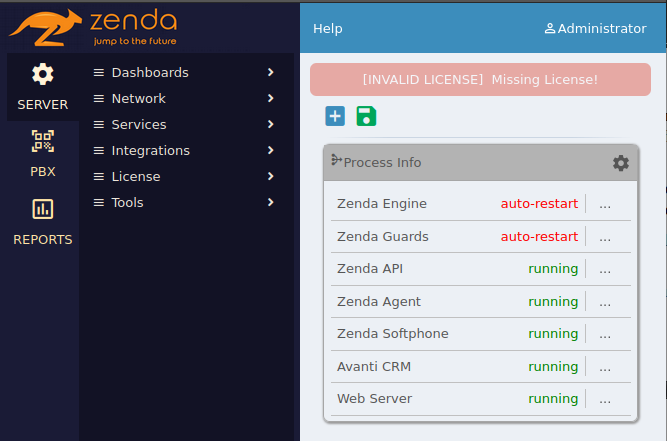
You also can check that your server is not actually functioning by adding a dashboard template of type Process Info (follow the steps listed in Upgrade Packages section to add this dashboard widget), which list all the Zenda Services, and you’ll see that there are 2 dropped services, Zenda Engine (which is the main system service) and Zenda Guards (which is a very important and functional service for server health & safety).
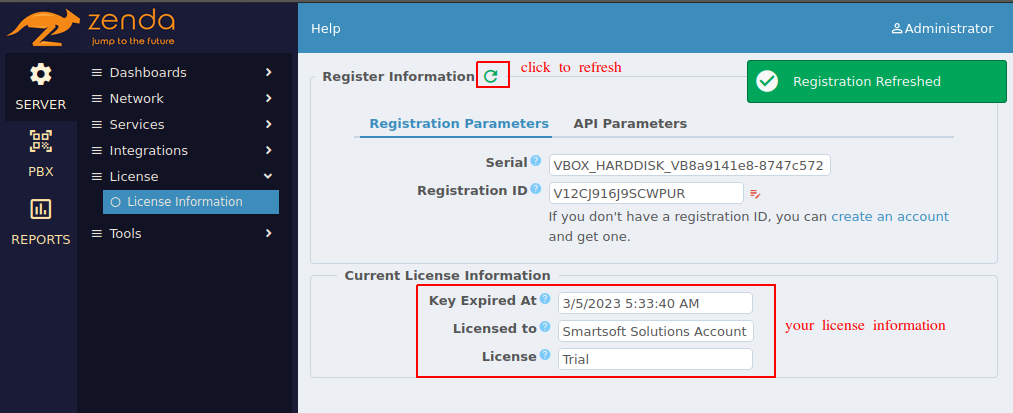
- From Administrator app, select SYSTEM > License > License Information menu option. This will open a page showing your current license info, and you’ll notice that you don’t have any license yet.
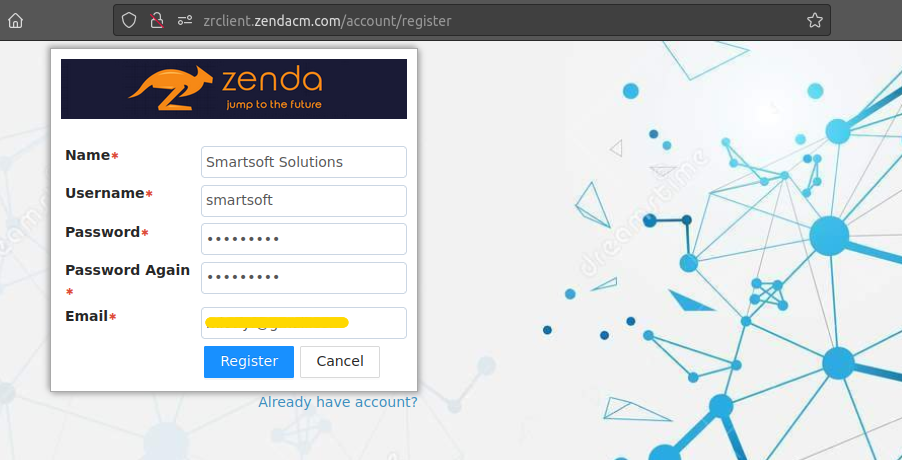
- Click on Create an account link, which will redirect you to the registration website
Since you don’t have any account yet; click Don’t have an account and fill in your account info. Note that you must set your data carefully since this will create your servers’ permanent account.
After filling your info & press Register; your account will be created and a confirmation mail has been sent to your email address, which you must follow to confirm your registration & activate your account.
You can login to your account now (using the username & password you set during the registration).
If you don’t receive the confirmation mail for a while, you can click on Resend confirmation email to get it. After email confirmed you can use the account within your server.
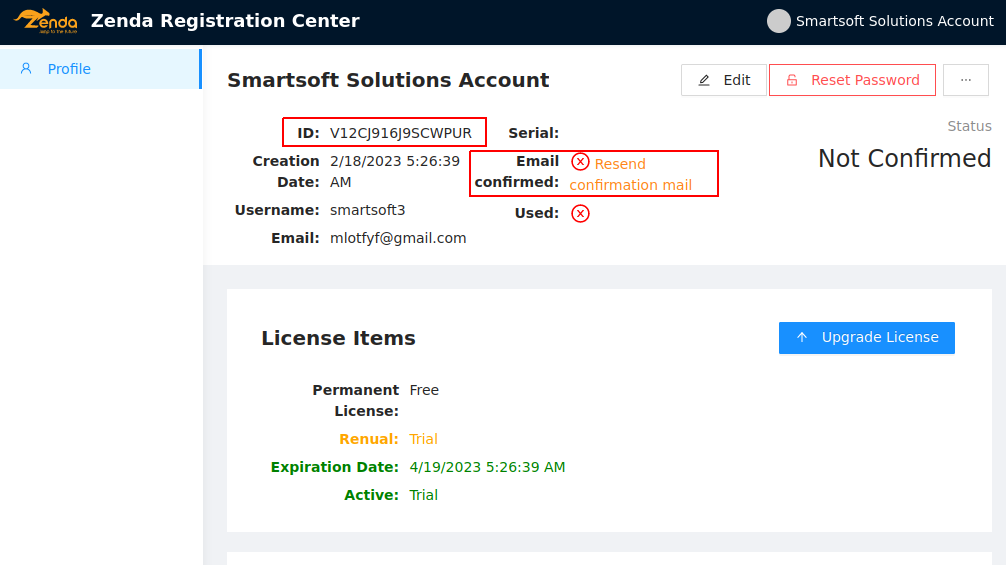
From your account page, copy Registration ID, and go back to your Administrator app (License info page) then past it in the Registration ID field, and press Refresh button.
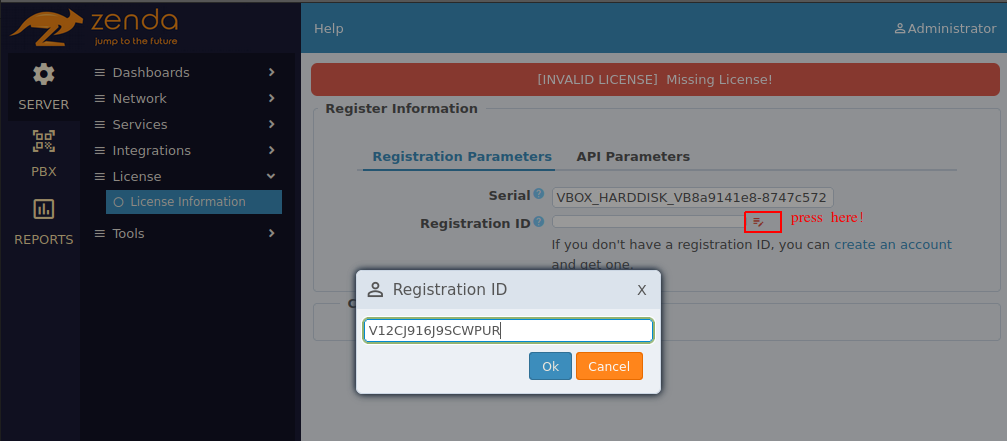
The account license should be applied now, and your server becomes really Up & Running
Complete Installation (Arabic)
Next Step
Now, you successfully installed your Zenda server, and completed after installation procedure, and your server become Up & Running; it’s time to start use your server and make some phone calls activities, which is the topic of the next article.